Saturday, March 10, 2012

Salted Almond Butter Bars

Recently, I've been in the mood for something sweet and salty. Something a little nutty. While reaching for the peanut butter, I remembered that I had bought some maple almond butter and forgotten all about it.

Now peanut butter is good, but almond butter is well, 
AMAZING!

In other words, you can't go wrong here. 
A creamy base topped with melted white chocolate and lots of salty chopped almonds.


Salted Almond Butter Bars
For the Base:
1/2 cup (1 stick) butter, softened
1/4 cup cream cheese, softened
3/4 cup almond butter
1 1/4 cups light brown sugar
1 large egg at room temperature
1/2 tbsp almond extract (or vanilla extract)
1 1/4 cups flour
1/2 tsp baking powder
1/4 tsp salt
For the topping:
3/4 cup white chocolate chips, or broken up white chocolate
2 tbsp heavy cream (adding a little more if necessary)
3/4 cup salted almonds, chopped
Preheat oven to 325 degrees F (170 Celcius).
Grease and flour a square baking pan or a jelly roll pan.
In a large bowl, beat the butter, cream cheese, and the peanut butter with electric mixer until light and fluffy. Add the brown sugar and beat until very smooth. Add the egg and almond extract and mix well. Add flour and mix just until incorporated. Spread the batter into the prepared pan. Bake for 15-20 minutes or until a toothpick inserted into the center comes out with moist crumbs attached.  Be sure not to overbake. Let the bars cool to room temperature.
For the topping, in a small saucepan over low heat, melt the white chocolate chips with the cream, stirring constantly until smooth.  Drizzle the white chocolate mixture over the cooled blondies, then sprinkle the chopped almonds on top.
Cool to room temperature before cutting and serving.
That is, if you can wait that long.

Thursday, March 1, 2012

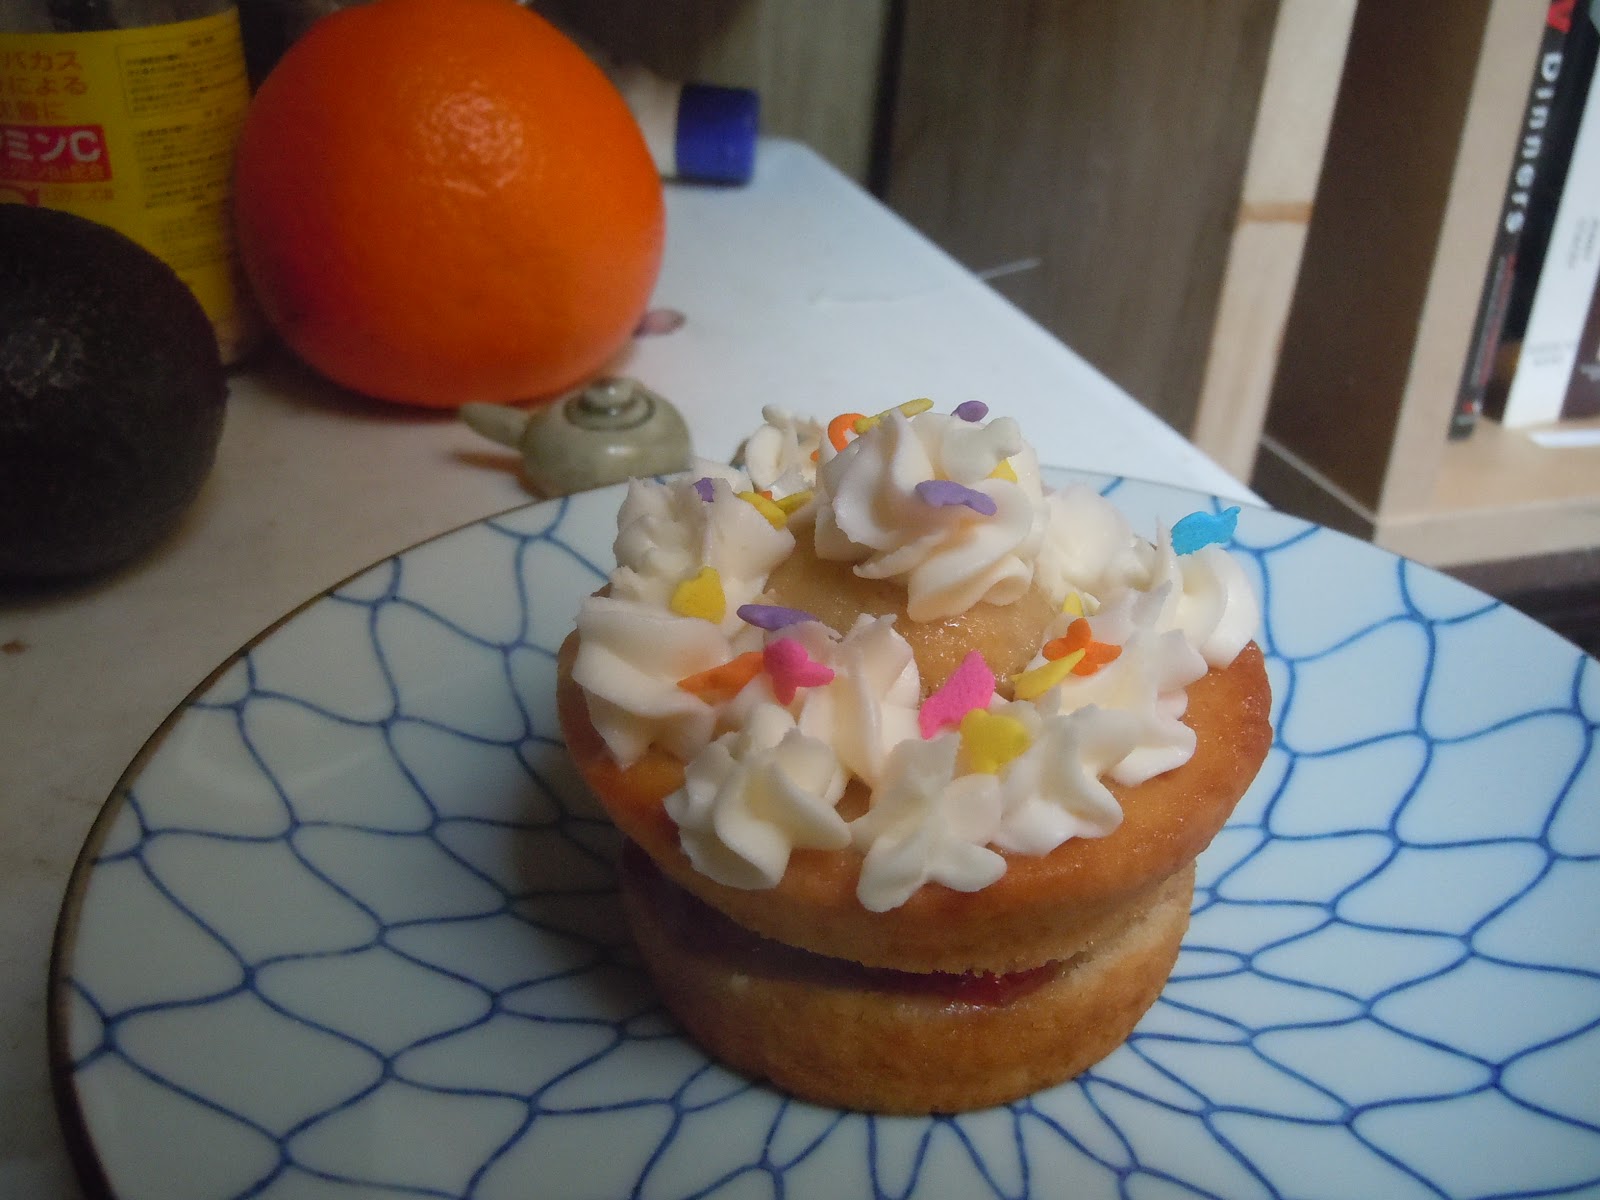
The easy like Sunday morning cupcake


Recently, I teach several private English lessons at my house. I serve coffee or tea and always some kind of sweet. I enjoy baking, so I usually make something new every week.  
But sometimes, I just run out of time.  This is when I use:

The easy like Sunday morning cupcake!

I generally keep a batch of vanilla cupcakes in the freezer and sometimes icing as well---very handy!

Ingredients:

vanilla cupcakes
strawberry jam
buttercream icing (or store-bought frosting)
colorful decorations

How to:

Split vanilla cupcake in half, bottom half slightly larger than the top. Generously spread a nice amount of strawberry jam (I recommend preserves with big chunks of fruit inside) on the bottom half and top with the upper half. If you are feeling creative, pipe miniature flowers with the buttercream icing using a pastry bag and star tip; alternatively spread icing on with a knife, swirling at the top. 
Top with colorful decor, nonpareils, or chopped nuts.

Monday, February 6, 2012

Coconut French Toast

Every once in a while, it's nice to have dessert in the morning.
That must have been the idea behind french toast, non?

It's freezing here in Kitakyushu and living in an old Japanese house with no insulation, I feel like I need to escape to somewhere tropical. Until I book my next trip to an island in Malaysia, this coconut french toast will have to satisfy my cravings.

Coconut French Toast

5 pieces of your favorite bread
2 eggs
1-2 tbsp condensed milk
2 tbsp butter
dash of milk or cream
shredded coconut
optional:  chopped nuts, cookie crumbs, whipped cream

Beat eggs lightly in a bowl, then add the condensed milk and dash of milk or cream. Melt a tbsp of the butter in a skillet (medium heat).  Dip bread on both sides into egg mixture and fry on both sides until toasty and lightly browned. Repeat with remaining butter/bread/egg mixture.  When ready to serve, cut bread into triangles, sprinkle generously with coconut, chopped nuts, cookie crumbs, and topped with a dollop of whipped cream. 

Tea-CupCakes

Jeeves, what is an equation?

Well, sir, it may go something like:
A cup of tea with a cupcake equals Bliss.
A tea infused cupcake is greater than or equal to Bliss.


Oh, Jeeves, that's simply genius.


Oh, no, don't thank me, sir.


Earl grey with bites of white chocolate, 
how could one possibly go wrong?
AND
Oddly enough, this cupcake reminded me of a buttery, fluffy pancake. 
I used a madeleine pan to make this one, but also made some with regular cupcake tins. Either way, they were delicious!

Tea-CupCakes

Ingredients:

3/4 cup milk (150 ml)
earl grey, or your favorite tea . . . 4 teabags
8 tbsp. butter, softened (110 g)
a generous cup of light brown sugar (about 220 g)
2 1/2 tbsp cream Cheese, softened (40 g)
2 eggs, at room temperature
a generous cup of flour (about 220 g)
a pinch of baking powder 
pinch of salt
1 bar of white chocolate, broken up into pieces

How to:

Preheat oven to 350 degrees F (180 degrees C).

Warm the milk until almost boiling in a saucepan, then add tea bags and cover with plastic wrap. Let the tea infuse for about 30 minutes, then discard the tea bags. 

Cream the butter until fluffy with electric mixer. Add cream cheese and brown sugar and cream until very light and fluffy (this should take about 4 to 5 minutes--- keep in mind, you can't over mix at this point.) Add eggs one at a time, blending well. Combine flour, baking powder and salt in a small bowl. Alternate adding the flour mixture and milk, mixing on a lower speed and until just blended each time. 

In greased cupcake tins or cupcake liners, fill 1/4 full with batter, put in a good amount of white chocolate break-up, and then top with batter 
until cupcake tins are about 3/4 of the way full.  

Bake cupcakes about 25 minutes or until a toothpick comes out clean.


Serve cupcakes warm topped with whipped cream and chopped nuts. 
Or frost with a nice lemon buttercream icing!

Saturday, January 28, 2012

Handmade Flour Tortillas


‘Handmade Flour Tortillas?!’ you say.  
Actually, not so difficult. Not difficult at all, in fact.
I don't know about you, but when I'm having a good week, I make sweet things. . . cakes, brownies, whip up a batch of espresso buttercream ('No biggie!' I say flippantly).  

When I'm having a bad week, though, (and this was truly a bad, bad week), I make bread. I have never owned a bread machine; I've always wanted one, but in Japan, they're quite pricey and I always think, 'Well, I can knead.  I have hands!' (I also do not own a rice cooker, and make rice in a pan nearly everyday. In Japan, this can be seen as an abomination. People ask me 'How can you possibly make rice without a rice cooker?', and my answer is always 'It's easy.') That being said, bread is not always easy; there's the kneading, the rising, the rising, AND more rising.  


But tortillas?  A snap.  No yeast, no problem, so it goes. 
Also, no oil when cooking the tortillas makes for very easy clean-up.


 As you can see, I could not locate my rolling pin, hence the substitute 
(which happened to be a gift from my mother-in-law; it's a suction tool for a brand of tupperware.)


Handmade Flour Tortillas
Ingredients:
3 cups all purpose flour
1 tsp. salt
1/3 cup (80 ml) oil
up to 1 cup (250 ml) warm water
Combine flour and salt in a mixing bowl. Make a well in the center, and add the oil and warm water (only adding enough water as necessary) to form a soft dough. Knead for about 5 minutes, or until the dough is smooth and elastic. Cover with a towel and place in a warm place for about an hour.  Divide dough into small balls (depending on what size of tortillas you prefer). Cover the balls with a towel or plastic wrap so that they don’t dry out. On a lightly floured surface, flatten a small ball with the palm of your hand (this makes it easier to roll into a circular shape), and then roll out until fairly thin with a rolling pin. Heat a dry skillet (heavy iron skillet, if possible) over medium heat.  Cook the tortilla for about a half a minute to a minute on each side.  If bubbles start to form, press down with a  spatula. Repeat with all of the dough. The tortillas should be slightly browned but still soft. After cooking each tortilla, stack them, wrapping them in a towel and fold over.  (I learned this trick somewhere; it helps keep them more pliable.) Store tightly wrapped.

Use for quesadillas, burritos, or anything else you can dream up.
Like. . .Cherry Tomato-Oregano Tortilla Pizza!

Monday, December 26, 2011

Old World Danish Coffee Cake


This Christmas, my mom emailed me that she was making a coffee cake recipe I had made a long time ago (probably when I was about 12 years old).  I had a recollection of this recipe as something I'd found in a very old cookbook as being something similar to the origins of original German coffee cake.  I had entered the local bake contest, and actually won a prize at the time.  But, the kicker:

It's filled with crushed cookies!

Yes. yes. Yes!

I mean, how could something filled with crushed cookies possibly be bad?


Old World Danish Coffee Cake

1 pkg. or 1 TBSP. dry yeast                            Filling:
1/4 cup warm water                                        1 1/4 cup crushed cookies
1/2 cup milk                                                     1/4 cup melted butter
2 1/2 - 3 cups flour                                           1/4 cup sugar
3/4 cup butter                                                   1 cup raisins
3 TBSP. sugar
1/2 tsp. salt (omit if salt in butter)
1 egg

Soften yeast in warm water and milk.  In large bowl, measure 2 cups flour.  Cut
in butter.  Add sugar, salt, egg, and yeast mixture.  Blend
Add 1/2 to 1 cup more flour to form stiff dough.  Knead about 3 mins.
Cover, let rise in warm place 1 hour.
Divide dough in half, rolling one half with hands into a sausage shaped strip
24 in. long.  Flatten, then sprinkle 1/2 filling mixture.  Seal with fingers.
Shape on baking sheet.  Repeat with remaining dough.
Sprinkle with sugar and nuts.  Bake (375) 25-30 mins.  Drizzle with glaze
made from confectioners sugar and milk.

Thursday, November 10, 2011

Chocolate Sprinkle Toast

Yum!
Chocolate sprinkles on buttered toast. 


Could life be any better, really?
Simplicity, simplicity.